How to Lay Pavers: A Step-by-Step DIY Guide
In this post you are going to learn the best way on how to lay pavers by yourself from start to finish
PAVERS
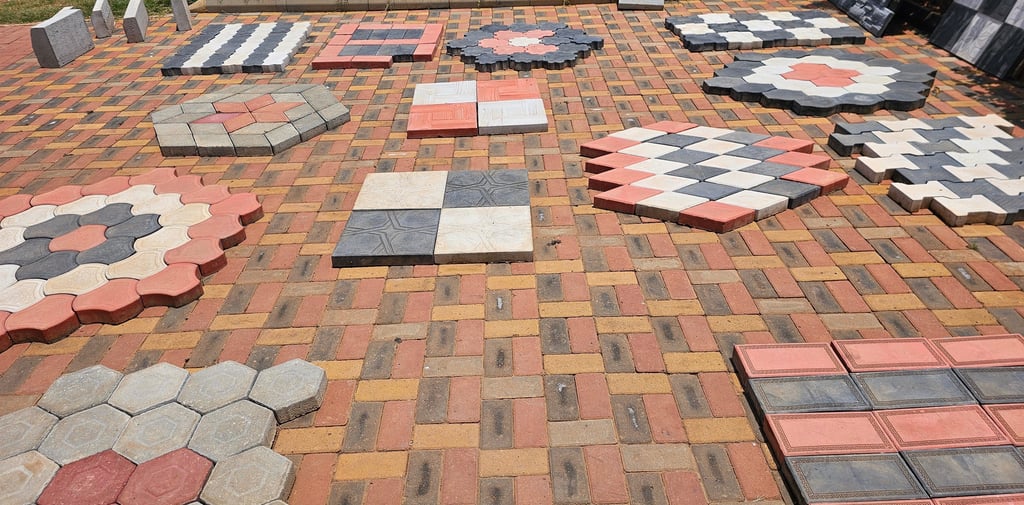
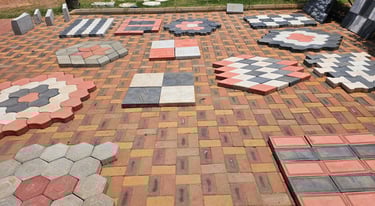
Table of Contents
Introduction
Planning
Decide Area & Slope
Measure and Mark
Choose Paver Design
Gathering Materials & Tools
Site Preparation
Clear Vegetation
Excavate Soil
Spreading Muram
Compacting the Base
Building Road Kerbs
Spreading Sand
Laying Pavers
Cutting Pavers
Covering Manholes
Final Compaction
Painting Kerbs
Cleaning
Conclusion
Frequently Asked Questions
Core Concept or Idea
In this post you are going to learn the best way to lay pavers by yourself from start to finish
As civil engineer with years of experience in building and construction, I’ve developed a simple step-by-step guide to help everyone lay pavers efficiently
Laying pavers is a popular choice for driveways, walkways, and patios, providing a durable surface that can withstand harsh weather. This guide will walk you through these detailed steps, and by the end of this post, you’ll be able to handle this DIY project with confidence.
Step-by-step process to lay pavers
1. Planning and Preparation
The first step in laying pavers is planning and preparation. This phase sets the foundation for a successful installation.
1. Decide on the exact area where you want to lay paver while leaving out the other part for green grass garden
2. Determine the slope of the water by taking levels
3. Under this stage you determine the total area of the place where you want to lay pavers in square metres
4. Measure and Mark: Start by measuring and marking the area where you want to lay the pavers. You may use a long tape, a laser tape, or any other linear measuring tools to determine the total area where you want to lay pavers in square metres. For example if you have decided to lay pavers on an area that is 20m along the length and 5 m along the width, the total area here is 100 square metres
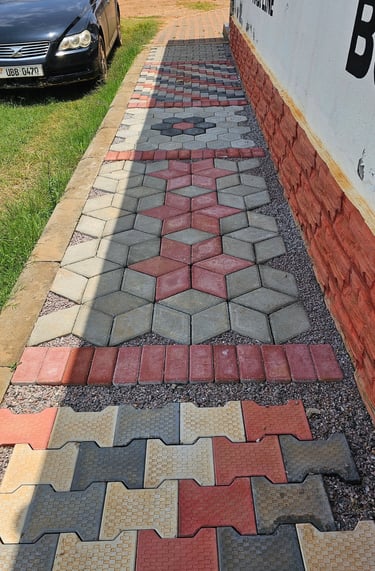
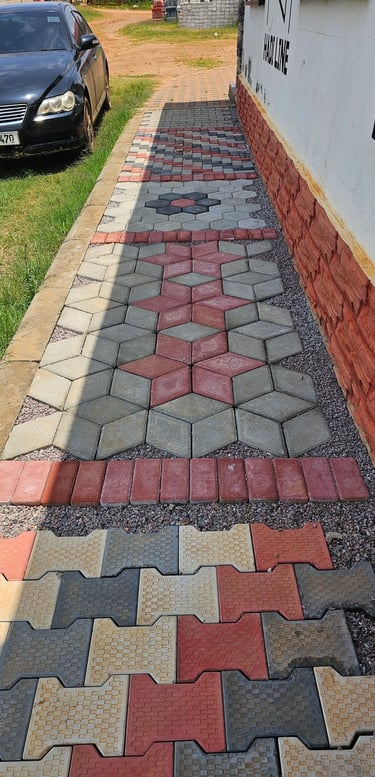
5. Decide on the type of paver pattern or design you want. There are a number of styles to choose from, so select one that complements your outdoor space.
Below are different paver designs or patterns with the number of pavers per square metre. Discover which style suits your outdoor space best
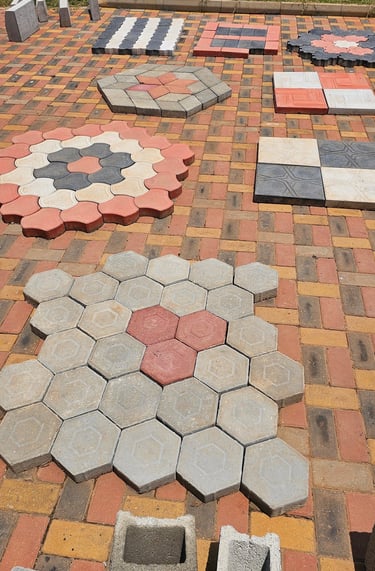
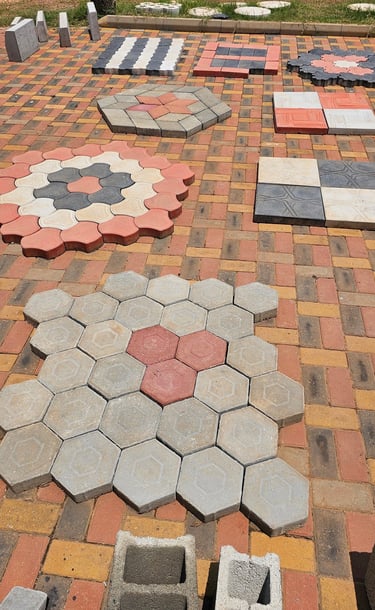
Calculate the quantity of pavers required. Based on the dimensions of your project, calculate the number of pavers required. This will help you avoid either underestimation or overestimation.
2. Gather Materials and Tools
Once you have your plan in place, it's time to gather the necessary materials and tools.
For example, let’s say that the total area where you want to lay pavers is 100 square metres, and you have chosen rectangular pavers. Considering that there are 50 pavers in 1 square metre,
Total number of pavers required = total area x pavers in 1 square metre
= 100 x 50
= 500 pavers required
You have the option to either make your own pavers, which can be more economical, or purchase them from a local supplier. Here are the essential tools you'll need:
Materials and tools required to lay pavers
Pickaxe for digging in hard areas.
Shovel to assist with excavation.
Wheelbarrow for transporting materials on site
Spades for loading excavated material.
Strings or building lines to ensure the correct slope for drainage.
Tape measure for accurate measurements.
Levelling tools (spirit level, dump level, or water level).
Compactor plate for compacting the base.
Grinder with a diamond cutting disc for cutting pavers.
Electric wire to power the grinder.
Compactor roller for additional compaction.
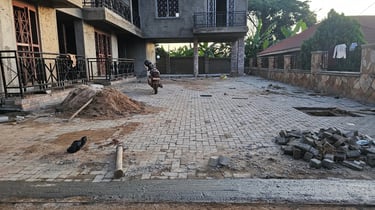
3. Site Clearance and Excavation
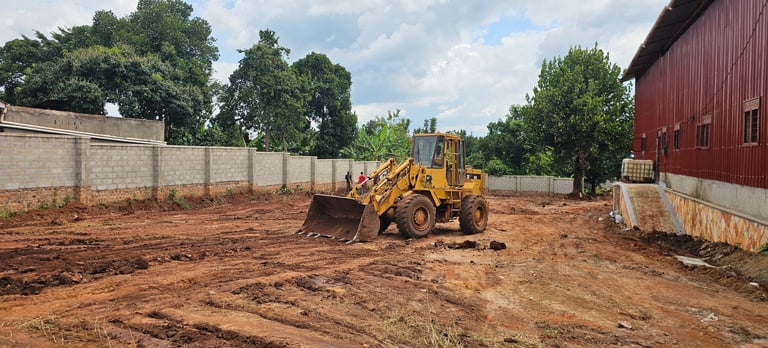
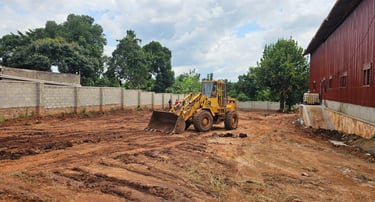
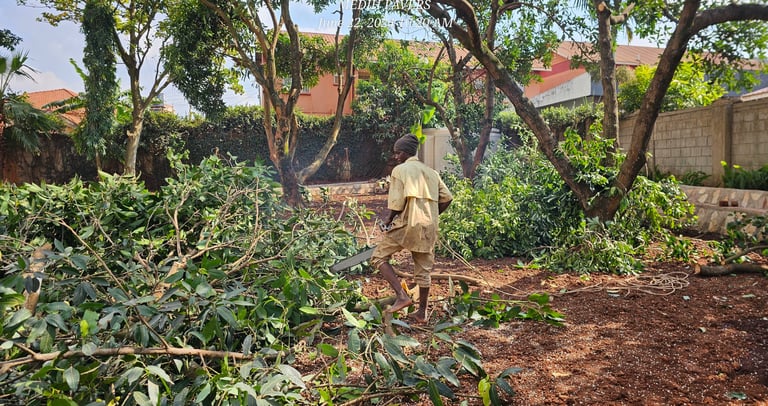
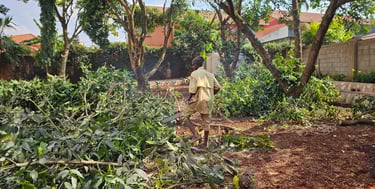
Before laying the pavers, the site must be cleared.
Remove Unwanted Vegetation: Cut down any shrubs or small trees that may interfere with your project and dispose of all of them away from the site. Be sure to protect any wanted plants.
For large projects, you can use a grader for site clearance and grading the compound, and for small projects, you can use hoes and spades.
Excavate Soil: After clearing the site, excavate the top black soil while adhering to the planned slope. Dispose of the excavated soil away from the site.
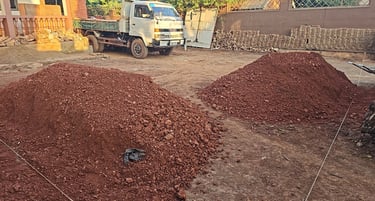
4. Spreading Murram
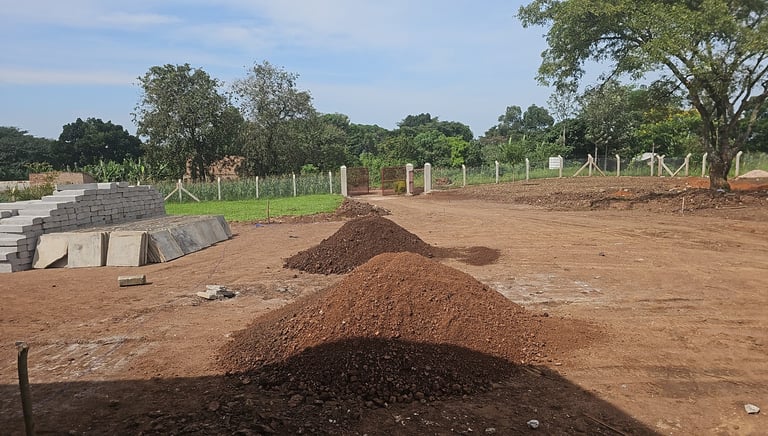
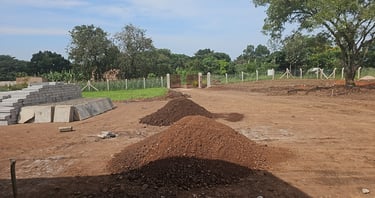

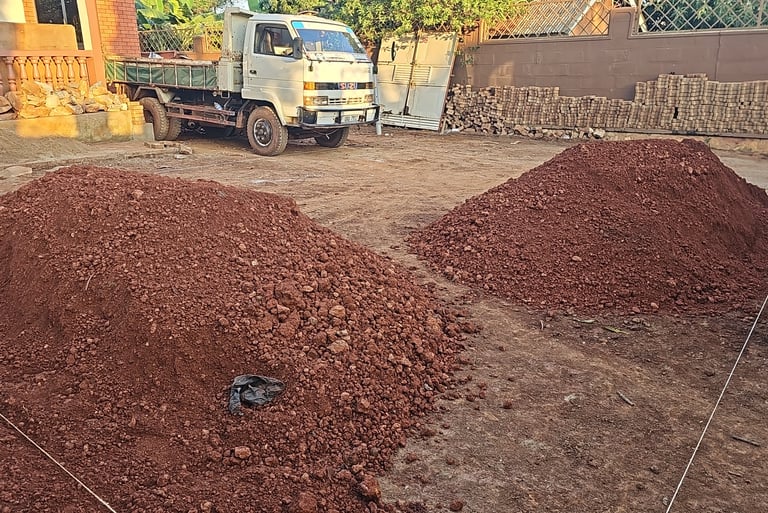
Murram is a crucial component that provides a stable base for your pavers.
Import the murram to the site and spread it across the area where the pavers will be laid to a depth of approximately 75 mm. It’s essential to mix in seven bags of road lime for every four tonnes of marram to enhance stability and prevent settlement. 4 tonnes of marrum are equivalent to one forward truck. Therefore, for every single forward truck of marrum, mix with 7 bags of road lime.
Road lime prevents grass from growing between the pavers, so ensuring its inclusion is important, as you won’t incur regular costs of hiring people to uproot the grass that grows within the pavers.
Road lime also hardens the base layer where we want to lay the pavers; therefore, when laying pavers, for example in weak soils such as waterlogged areas, be sure to mix road lime in the marrum. Each bag of road lime is 15 kg (confirm).
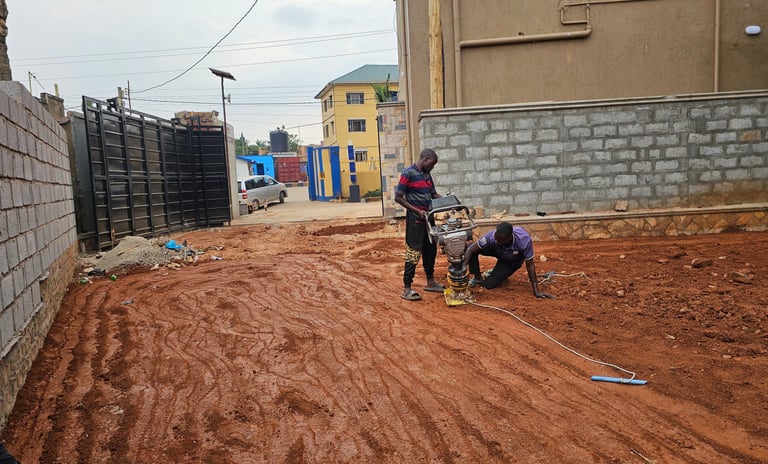
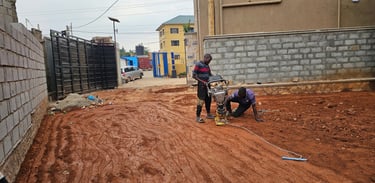
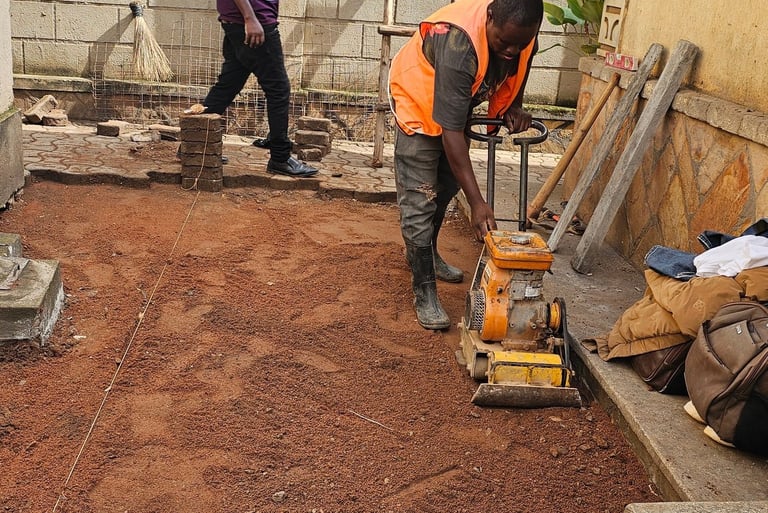
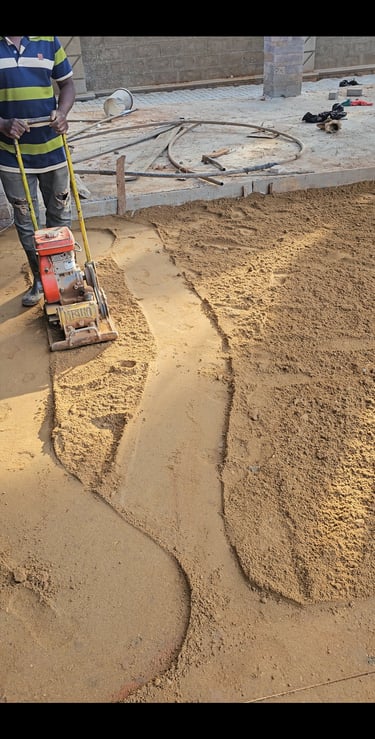
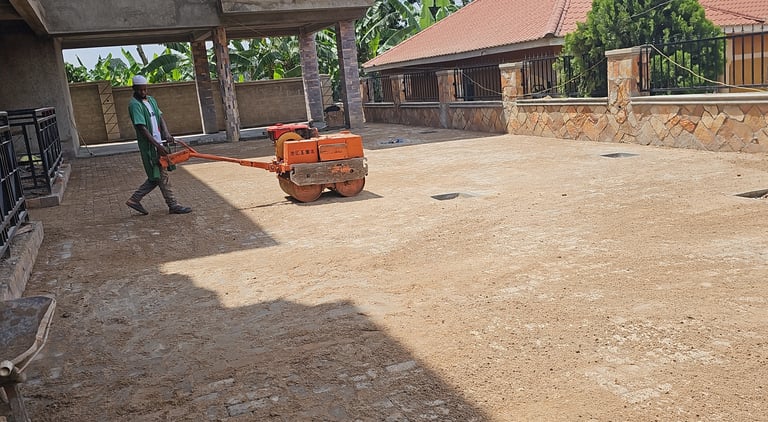
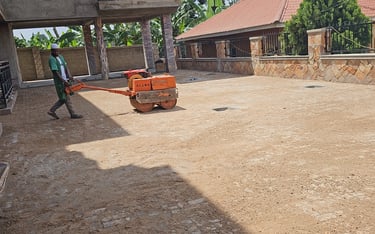
5. Compacting the Murram
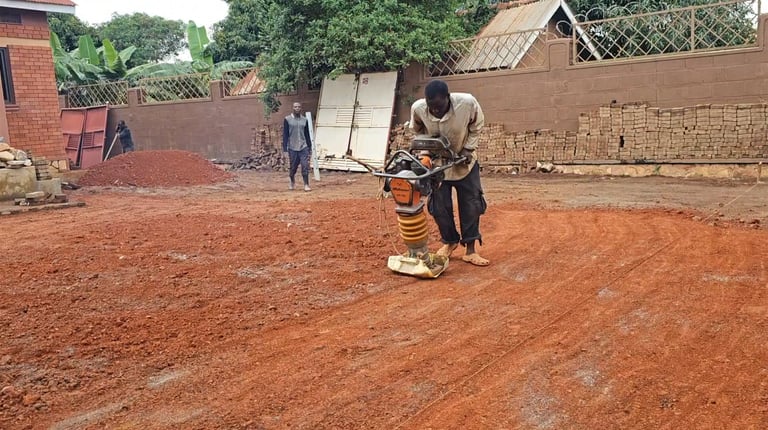
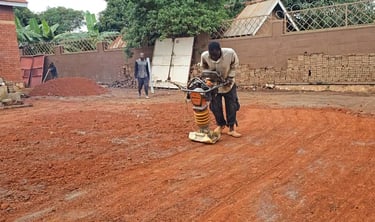
Compaction of the murram is a critical step in ensuring a solid foundation for your pavers.
When working on bigger projects or areas meant to have high traffic, you can use a bigger compactor roller; then for areas intended for low traffic, you can use a smaller compactor roller.
Begin by using a roller to create a flat surface, followed by a jumper to compact the maram thoroughly. Watering the maram during this process helps fill any gaps and achieves the required level. Repeat this compaction process while sprinkling with water multiple times to achieve maximum dry density (MDD).
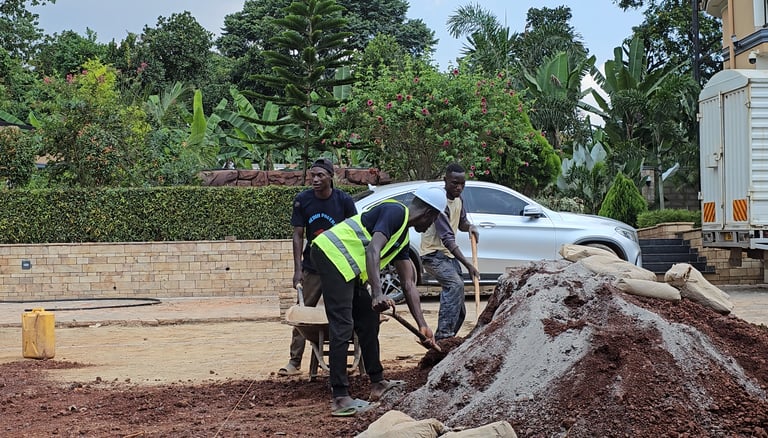
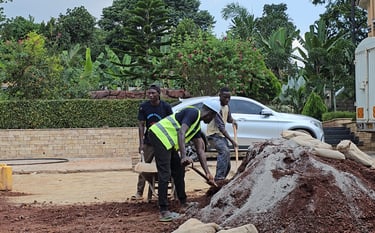
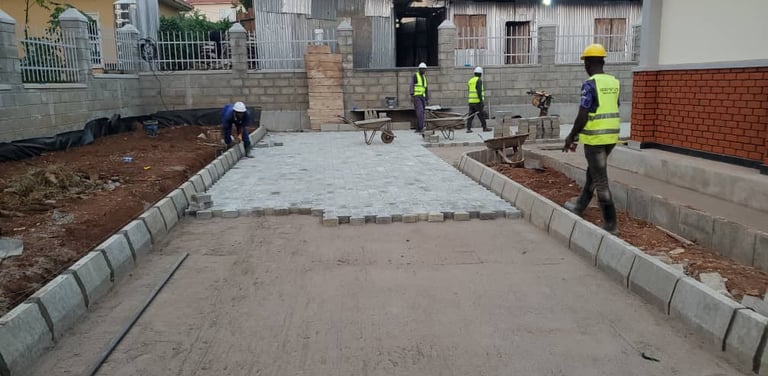
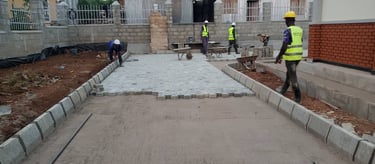
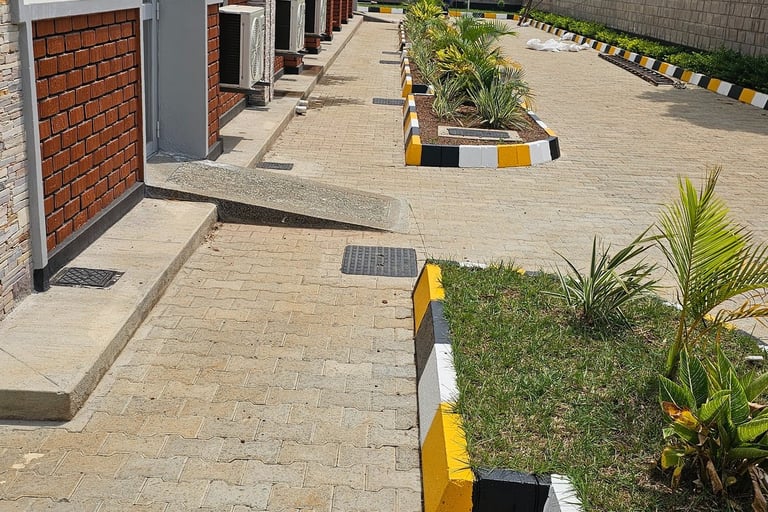
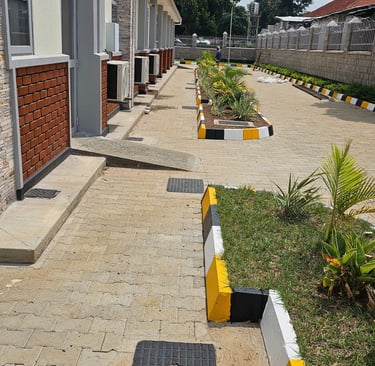
6. Building road kerbs
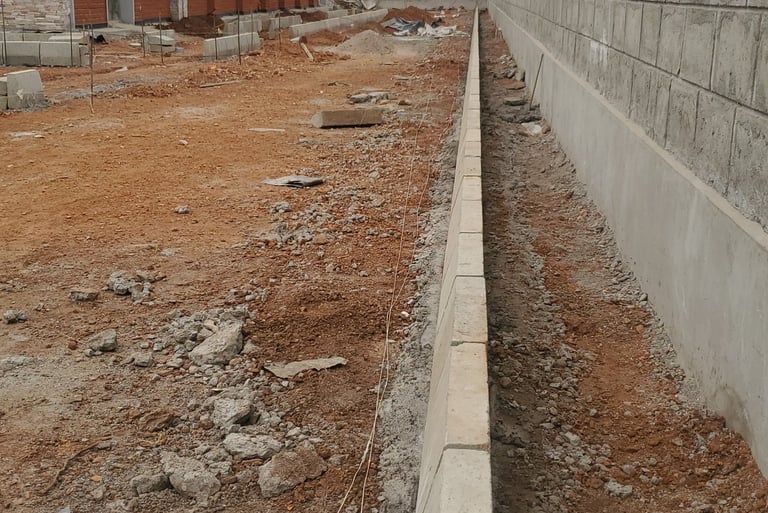
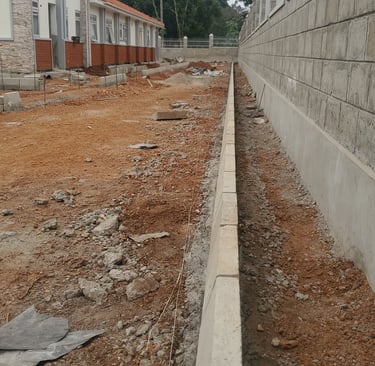
Road kerbs help define the edges of your paver area and provide structural integrity. Road kerbs also separate the area where to lay pavers and the area for the green grass.
Cast a concrete strip along the marked lines for the road kerbs, selecting the height of the road kerbs based on the soil you are retaining. For instance, if you are retaining soil that is 100 mm high, choose road kerbs of either 150 mm or 200 mm height.
For example, for this particular soil here, the solid we were retaining was 200 mm high, and we used road kerbs of 300 mm height.
Road kerbs at the gate entrance have to always be level with the pavers.
Ensure the kerbs are built to the correct height to support the surrounding soil effectively.
7. Spreading Lake Sand
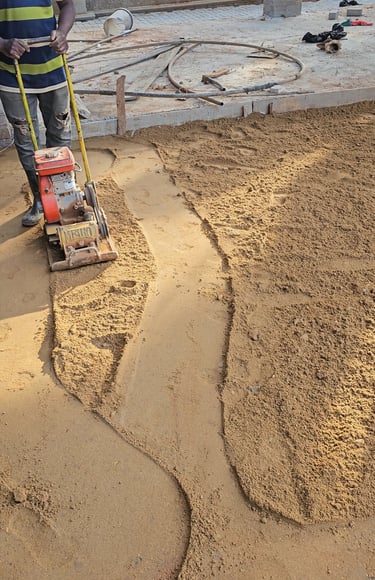
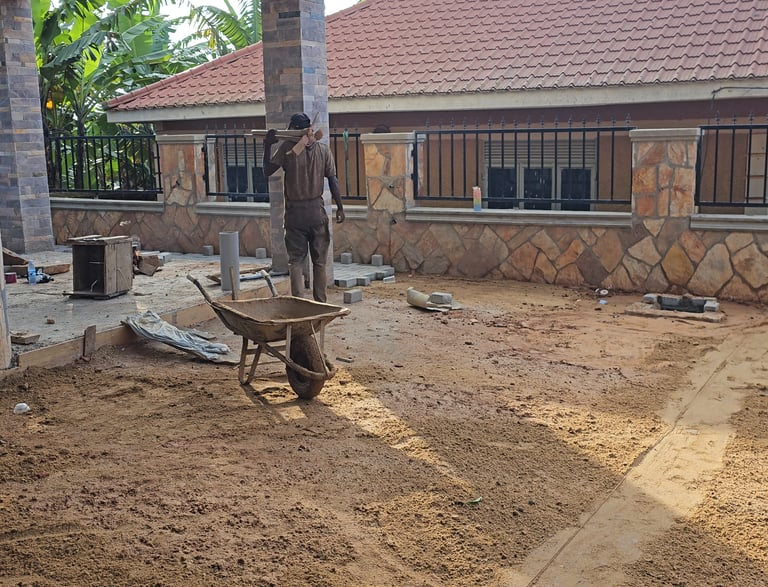

Once the murram is compacted, it's time to spread lake sand.
Spread the sand to a depth of at least 50 mm over the murram and compact it again using a compactor plate or roller. This layer will serve as the bedding for the pavers.
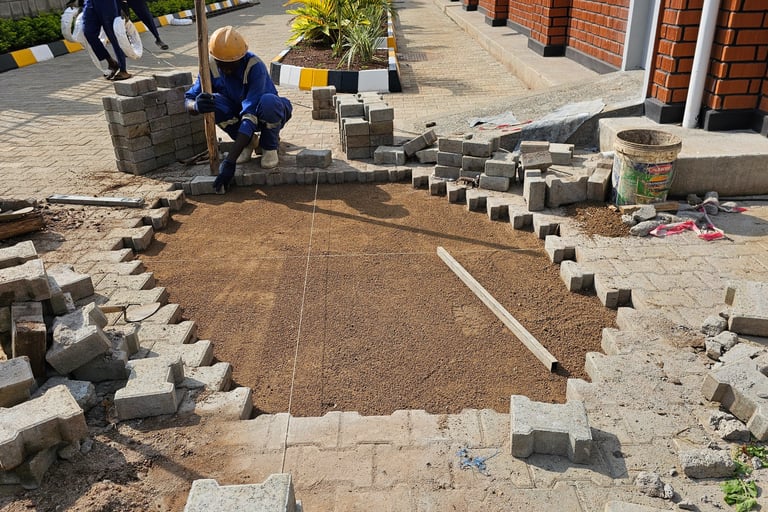
8. Laying the Pavers
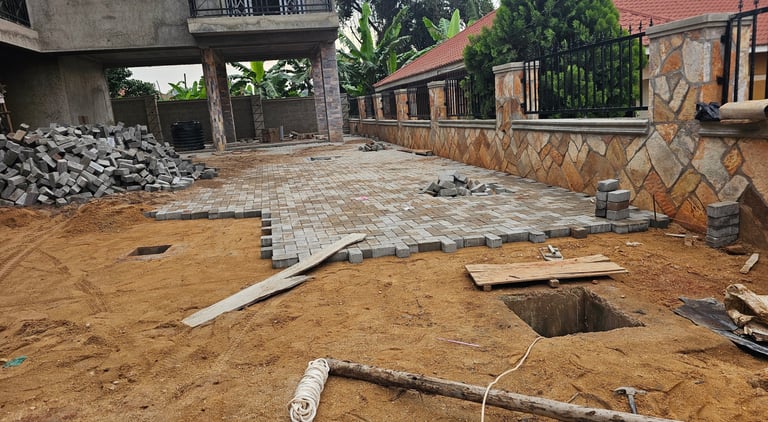
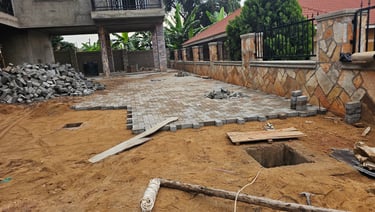
Laying the pavers is the most exciting part of the process because this is where your vision begins to take shape.
Choose your desired pattern and mark straight lines to guide your installation. Ensure that the pavers are laid in a straight line and maintain a consistent slope for drainage. Use the strings or building lines to help guide the placement and prevent any zigzag patterns that will clearly be visible after laying
Always choose the best paver design pattern based on the already existing designs on the house to create some correlation
9. Cutting Pavers Around
Use an angle grinder with a diamond blade to cut pavers around the entire perimeter of the compound, around manholes, and also where pavers touch the house. We intend to install rectangular pavers in these particular positions and that’s why we have to cut the pavers to be able to fit the rectangular pavers
This step ensures that the pavers fit very well around any obstacles, creating a good look.
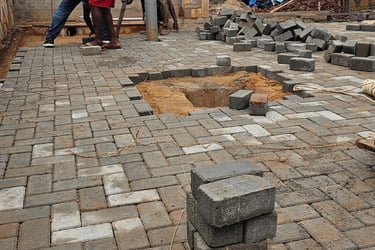
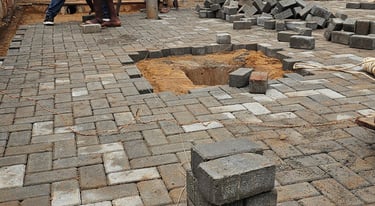
Covering manholes

As shown above, this way of covering manholes is not the best, and I'm going to show you the best way to do that below.
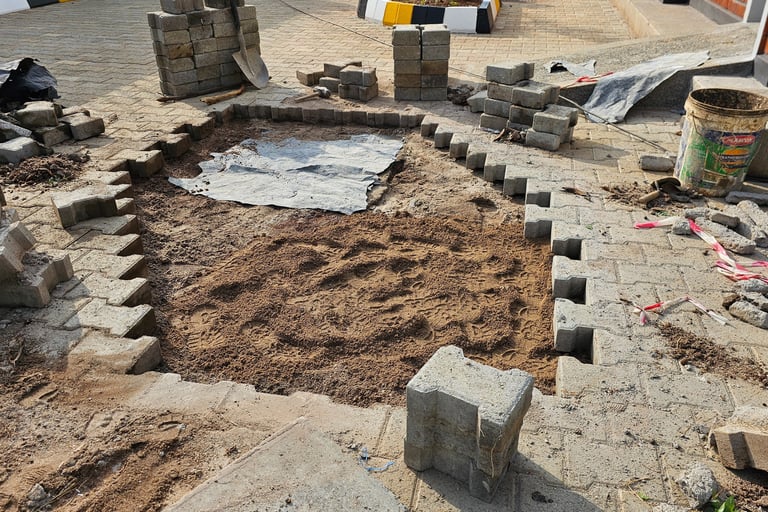
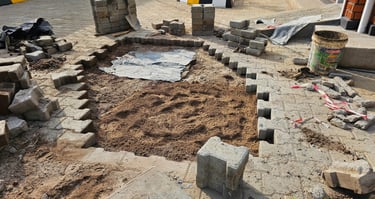
Usually there are main manholes and smaller manholes, and what we normally do is that we cover the smaller manholes, but how?
Main manholes are the manholes on top of the septic tank. Other manholes in the plumbing system are not main manholes
First and foremost, we must make sure that all small manholes or all manholes along the driveway or car parking areas are built to a level below the top surface of the pavers. Cover the manhole with its manhole cover
After that, cover the manhole with polythethe sheeting or any other DPM, After that, spread lake sand on top of the polythene sheeting and then lay pavers on top and then mark the area with the manhole with a road marker.
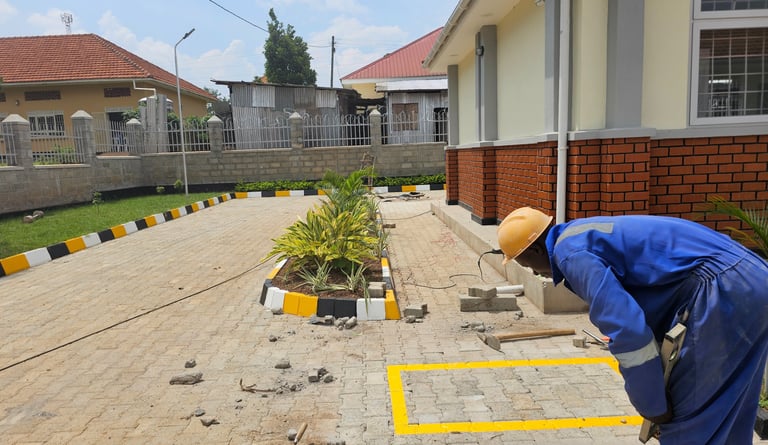
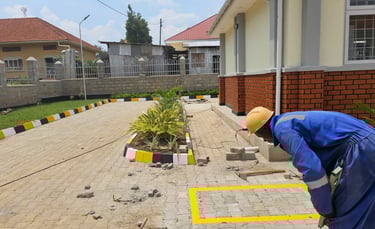
We mark every place with road marker paint such that in the future, in case of any blockage in the plumbing system, it’s easy to identify the position of these manholes.
10. Spread plaster sand on top of the laid pavers
Spread plaster sand on top of the pavers and allow rain to fill the joints. If you have no rain in your area, consider sprinkling with water on top of the pavers to allow plaster sand fill the joint
11. Final Compaction
Run a roller over the pavers to help settle them into the sand bedding. Avoid using a compactor plate on the pavers, as this can damage the compactor plate. A compactor plate is made to compact on soft surfaces for example, when compacting marrum or any other soft surfaces
12. Painting road kerbs
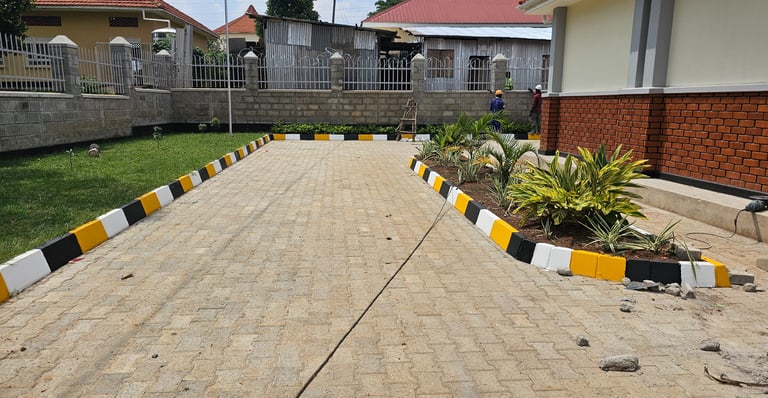
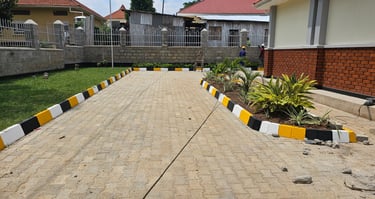
Lastly, you can consider painting road kerbs to your favourite colour to come up with the colour design you want
Be sure also to mark properly the guiding lines in the parking area, and also write any logos or words on the pavers if necessary
We use road marker paint to paint on the pavers, as it can sit for long on the pavers or road curbs without getting rubbed off.
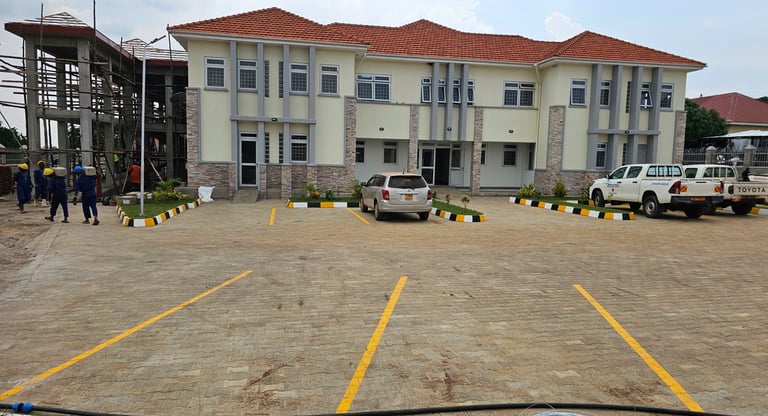
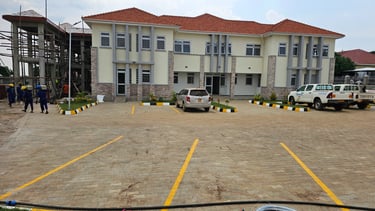
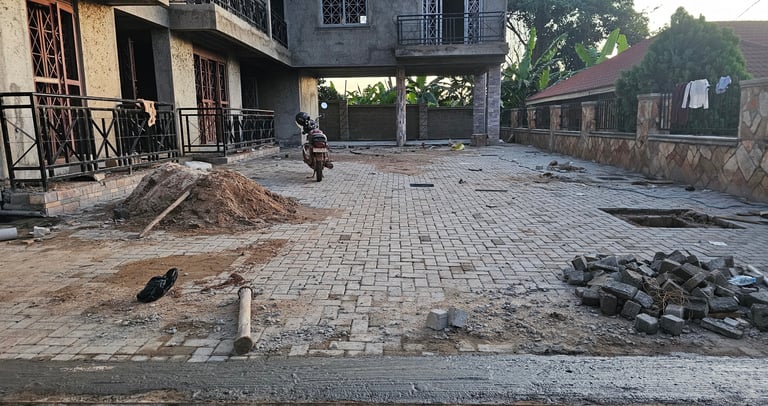
13. Cleaning the area
Sweep away any excess sand from the surface of the pavers, wash the pavers with clean water and a hard brush and hand over the work to the client
Conclusion
By following the above steps, you can successfully lay pavers and transform your outdoor space. Remember to plan thoroughly, gather the right materials and tools, and take your time with each step to ensure a professional-looking result.
Frequently Asked Questions
What is the best base material for pavers?
The best paver base materials are marrum and lake sand. We excavate off the existing black soil, dispose it away from site and then spread maruum, compact it, spread lake sand compact it also and this will create a strong base during paver installation
How much does it cost to lay pavers?
On average, the paver cost per square metre to install ordinary pavers ranges around 15 USD, including labour and material. There is a difference between ordinary pavers and classic pavers; ordinary pavers are relatively of a lower cost. The cost of buying 1 square metre of ordinary pavers is 9 USD, whereas the cost of buying 1 square metre of classic pavers is 13 USD. Labour costs to lay either ordinary pavers or classic pavers remain the same. Therefore, the labour cost to lay 1 square metre is around 5-6 USD.
This is the paver installation price that we charge here in my country and in our company, so the costs will vary in different countries and different regions
How thick should the paver base be?
The paver base thickness is typically made of marrum and lake sand. On average, the marrum will be at least 75 mm thick, and the lake sand will be 50 mm thick. These measurements will vary depending on the level and slope you want to achieve
For example, you will find some areas where you will need to excavate over 250 mm of black soil off and dispose of it away from the site. Remember, you have to fill that part again with marrum to achieve the level you want. So in some cases, you will find yourself using a lot of marum.
Ensuring a proper base depth for pavers and understanding how thick a paver base should be ensures long-term durability after installation
What is the best way to compact a paver base?
Compacting a paver base begins with using the right tools and doing it the correct way. The best tools for compacting a paver base include a compactor roller, a jumper, and a compactor plate.
The correct way is to mix road lime in the marrum to harden the base. You have to do compaction while sprinkling with water to remove the air voids.
Following this paver compaction guide will give you to a more durable base for the pavers
Can I lay pavers directly on soil?
No, you cannot lay pavers on soil. The base will settle and can lead to uneven surface time
Secondly, grass will grow within the paver joints.
My paver compound already has grass growing within the pavers; what can I do to stop the grass from growing within the compound?
You will need to renovate the whole compound. I’m going to give you two methods on how you can go about this, and you will choose one by yourself
Method 1.
First and foremost, the commonest reason why grass is growing in your paver compound is simply because you never included road lime in the marrum at the time of laying pavers. And this is how we are going to go about this
Remove all pavers lay them aside, and do levelling afresh Import marrum mix 7 bags of road lime in every 4 tonnes of marrum 1 bag of road lime is usually 7 kg and 4 tonnes are equivalent to 1 fwd truck. Therefore, in simple terms, we mix 49 kg of road lime for every 4 tonnes of marrum.
Compact heavily with a jumper and roller Some people just use only compactor plates, which is wrong. Personally, I only use a plate when compacting sand through the whole process of laying pavers
And I use a jumper and roller all the time. Compact the marram properly, then spread lake sand and lay pavers on top
Method 2
Remove all pavers properly, compact the existing marrum with a jumper and roller and then lay the whole compound with polythene sheeting or any other DPM
On top of the DPM, spread lake sand of about 50 mm thickness, compact it with a compactor plate, and then lay pavers on top. Spread plaster sand to fill the joints compactly and clean off the excess sand
With any of the above methods, you will have to chase way grass from your pavers’ compound
What type of sand should I use between the pavers?
The best sand for paver joints is polymeric sand, or if you don’t have polymeric sand, you can use plaster sand. Choosing the right sand types for paver installations helps the pavers get locked in one place
How do I prevent weeds from growing between pavers?
To prevent weeds in paver joints, use road lime in the mortar at the time of compacting the paver base. Also, use polymeric sand for joints between the paver sand. This is a good alternative for weed control for paver patios. Following the above how to stop weeds in pavers tips will keep your patio looking clean
Can I use pavers for driveways?
Yes, driveway pavers are a good option for home owners. For drive-way paver installation, it is better to use pavers of 75-100 mm thickness and not less than that to create a strong base able to counter the vehicle's weight. You need to understand how to install drive-way pavers, as it will need heavier compaction to create a strong, reliable base to avoid unequal settlement
How do I maintain a paver patio?
Paver maintenance tips include regular cleaning of the pavers to ensure that they are dirt-free. One in a while, hire some on to clean the paver with clean water and liquid soap with a hard brush so that pavers can look nice again. The above guide on how to care for paver patios will ensure the durability of your paver compound.