How to Build a Concrete Stand for GRP Water Tanks
In this post, you are going to learn how to build a concrete stand for GRP (glass-reinforced plastic) tanks.
STANDS FOR WATER TANKS
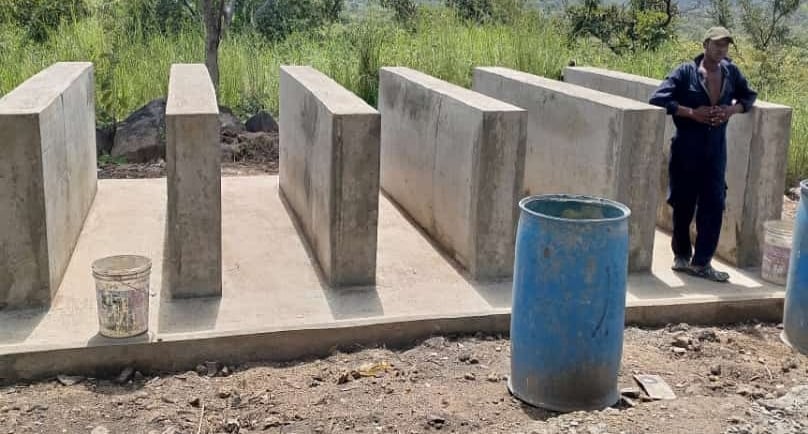
Table of Contents
Introduction
Proper Measurements for Your Concrete Stand
Measuring the Tank
Concrete Stand Guidelines
Determining the Size of the Structure
Adjusting the Length and Width
How Many Concrete Stands Do You Need?
Steps to Build a Concrete Tank Stand
Excavating and Preparing the Site
Concrete Blinding
Steel Reinforcements
Casting the Foundation
Formwork and Concrete for Stands
Finishing and Backfilling
Tank Installation and Plumbing
FAQS
Core Concept or Idea
As a civil engineer with years of experience in building water projects and other WASH projects, in this post I’ve prepared for you an easy step-by-step guide you can use to build a standard stand for a GRP tank from start to finish. The method that I use in this post is experience-based, tested and trusted, and you can rely on it when building a strong, durable base for a GRP tank or metallic rectangular tank of any size.
Step 1: The first step is to measure the dimensions of the tank so that we can build a stand based on the dimensions of the tank.
Before starting the construction process, we need to get the measurements right. Here are three essential guidelines to follow:

1. Concrete Stand Thickness: The stand should have a thickness of at least 300 millimetres. This ensures the base is strong enough to support the tank’s weight, especially when full.
2. Clearance beneath the Tank: Leave a minimum of 500 millimetres from the base of the tank to the ground to provide enough space for installation, maintenance, and any future repairs.
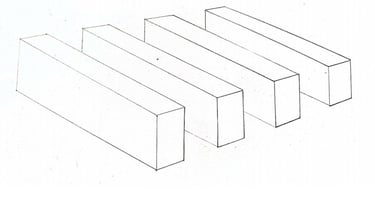
3. Stand Spacing: Each concrete stand must be spaced 1 metre apart, centre to centre since you have multiple legs supporting the tank, ensure the 1-metre as the maximum distance is kept for each stand.
Determining the Length and Width of the Structure
Now, let's figure out the overall size of the concrete base. The key here is to account for extra space for stability.
Along the Length: Take the length of your tank and add 300 millimetres to it.
Along the Width: Add 400 millimetres to the width of the tank.
For example les say the tank is 6m along the length and 4m along the width, the length of the base will be 6.3m along the length and 4.3m along the width
Another example, let’s say the tank is 4-metres long and with 3 metres width, you will have an external base measurement of 4.3 metres by 3.4 metres
How Many Concrete Stands or legs do You Need?
The number of legs entirely depends on the length of the tank. What is important is keeping in mind that these concrete stands should be maximum 1m apart centre to centre from one stand to another
For example for a 2-metre tank along the length, you will need three concrete stands, spaced 1 metre apart from each other. Similarly:
For a 3-metre tank along its length, you’ll need four concrete stands.
For a 4-metre tank, you’ll need five stands as simple as that
This formula keeps the structure strong, evenly distributing the weight of the tank.
Steps to Build a Concrete tank stand
We’ll now outline the full process in 10 easy steps.
Step 1: Set Out and Excavate
Do site clearance for the whole working area and remove top weak soil not exceeding 300mm dispose away the excavated material away from site.
Set out and excavate the foundation the base not exceeding 1.5m below the ground level depending on the strength of the soil for different location
Since we are considering a mat foundation, you have to excavate the whole area as a single pit
Remember to account for the working space in the pit and also the extra space 300mm along the length and 400mm along the width
After excavating, apply anti termite treatment to the sides and bottom of the pit
Step 2 concrete blinding
Cast a 50mm thick concrete of grade 15 at the bottom of the pit. You can use mix ratio 1:3:6 that is 1 part of cement, 3 parts of sand and 6 parts of aggregates
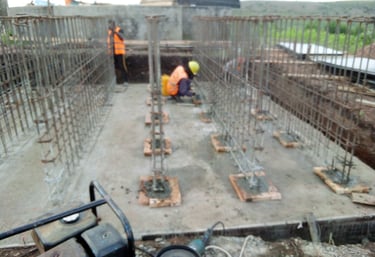
Step 3: Steel Fixing for the Raft Foundation
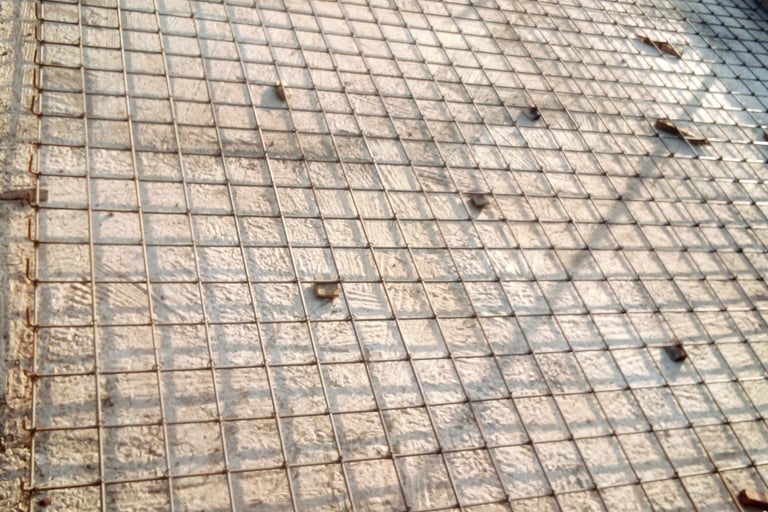
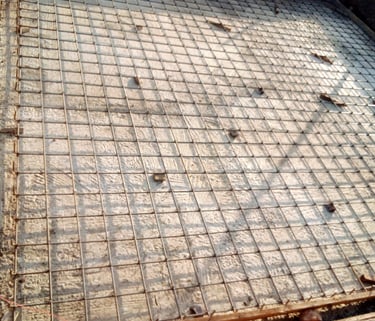
Install steel reinforcements using Y12 or T12 steel bars and tie them 150 millimetres apart, centre to centre from one steel bar to another in a mat format with both top bars and bottom bars. Ensure you also fix steel for the concrete stands which are fixed like columns. You should use steel bars of y16 for the stands. The height of the concrete stand should depend on the structural engineer’s drawings or details. You have to make sure that 1m is above the ground.
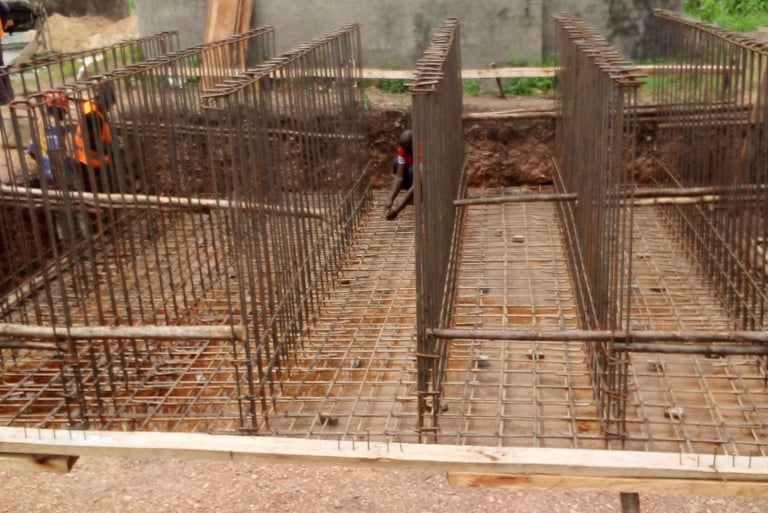
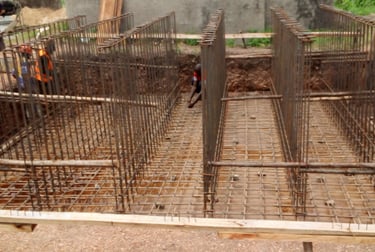
Also ensure that at the time of fixing steel bars, fix the bolts also which will be tied together with nuts to hold the tank firmly in position
Step 4: Casting concrete for the mat or Raft Foundation
The next step is to cast a 600-millimetre thick concrete raft using Grade 25 concrete. You can use mix ratio for this is 1 part cement, 1.5 parts sand, and 3 parts aggregates. This layer serves as the main structural support for the entire installation.
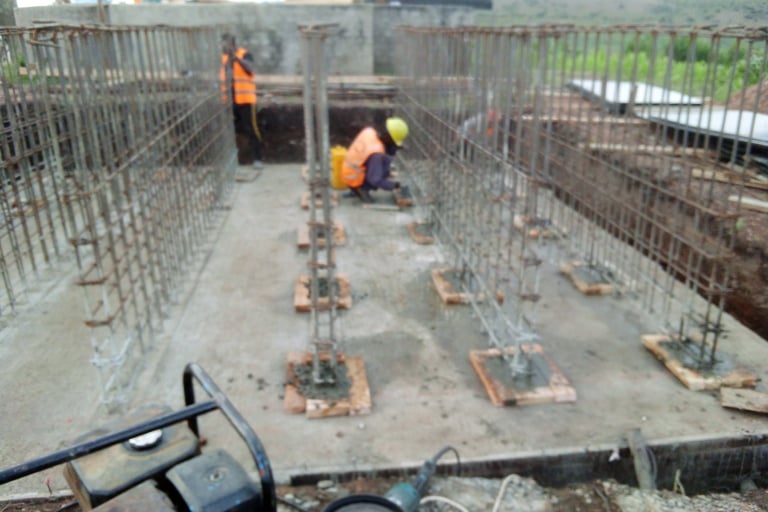
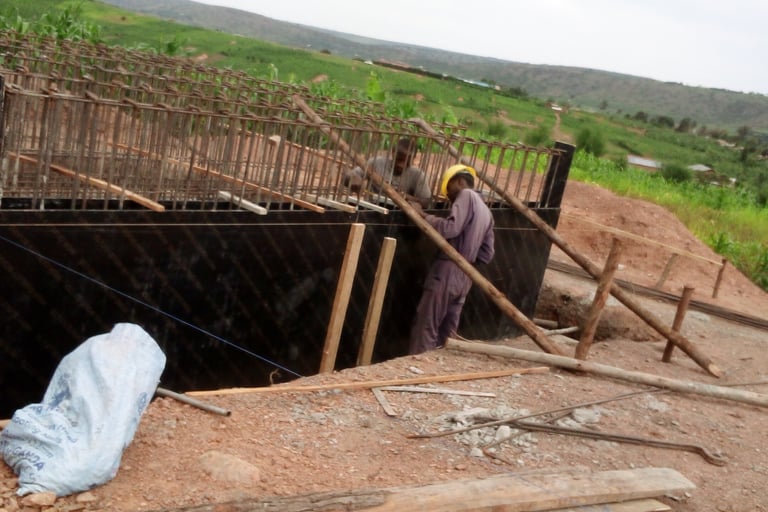
Step 5: Formwork for the Concrete Stands
Install formwork (shuttering) to hold the concrete in place while it sets so as help ensure the stands remain straight and well-formed.

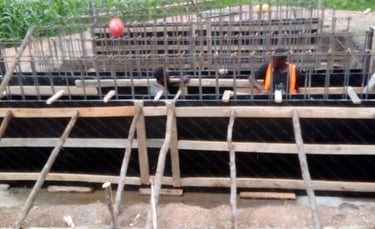
Step 6: Cast the Concrete for the Stands
Cast 300mm wide concrete stands of concrete grade 25 You can use mix ratio for this is 1 part cement, 1.5 parts sand, and 3 parts aggregates. Carefully protect the bolts when casting concrete
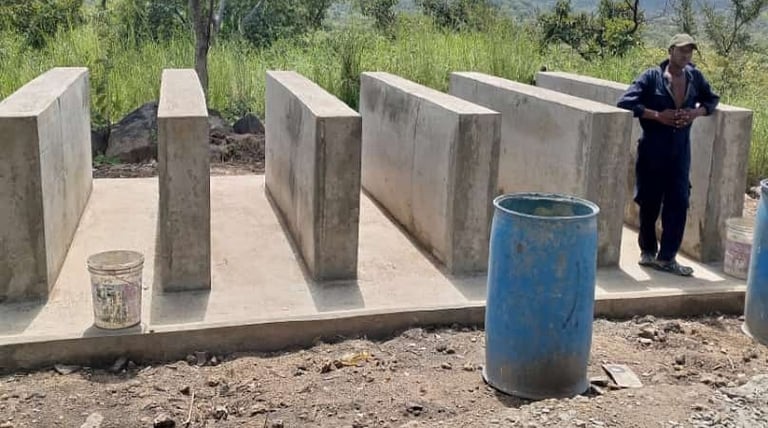
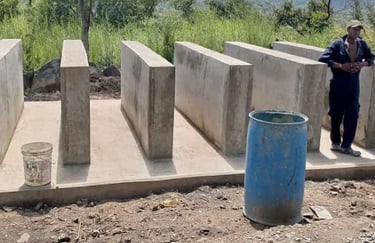
Step 7: Finishing the structure
Once the concrete has set, remove the formwork (de-shuttering). Remove Formwork and Finish the Surface Smooth out the surface of the stands and the exposed raft foundation. For a clean finish, apply a cement-based layer on top.
Step 8: Backfill the Excavated Area
Backfill the area around the foundation using imported marrum and the then compact.
Do landscaping ensuring the site is clear of debris. Do curing for at least 14 days to enable cement gain its strength before doing any fabrication to join the tank
Step 9: Fabrication

The next step is fixing the tank on the existing base or stand. Since the bolts are already existing , we begin by fixing the base channel , install the base plate on the channel, connect the side plate and collision angle, install the lacing system, install the cover plate, flange escalater and water level gauge follow these steps to ensure your tank is fully connected
Step 10 is plumbing fittings
After connecting the tank to the stand, the next step is to connect the plumbing system, that is the inlet pipe, outlet pipes and the overflow pipe
Step 10: Build a Fence for Security
Finally, construct a fence around the tank area. This adds an extra layer of security, protecting both the tank and the surrounding equipment.
FAQ
What is a GRP tank?
A GRP tank is a storage tank made from glass reinforced plastic which is a composite material combining glass fibres with polyester resin making it of less weight, strong and corrosion resistant
What are the advantages of GRP tanks over pvc tanks or plastic tanks?
GRP tanks vs plastic tanks
Fire resistant
GRP storage tanks are fire resistant and can offer more protection than plastic tanks which can easily ignite or melt when exposed to flames therefore GRP tanks are better in high risk environments such as industrial facilities and chemical plants
UV resistance
GRP tanks provide better uv protection compared to plastic tanks for example Prolonged exposure to sunshine will cause plastic tanks to fold whereas GRP tanks are more resilient to harsh sunshine hence making them a better option in desert areas or any other outdoor spaces exposed to severe sunshine
Structural integrity
When exposed to heavy sunshine or harsh environmental conditions or even vibration from the surrounding environment for example in factories, plastic tanks lose shape or even break whereas GRP tanks on the other hand maintain their structural integrity even in harsh environmental conditions. This makes GRP tanks a better option to act as large water tanks or industrial storage tanks in large industries or factories where there is constant vibration since GRP tank tanks maintain their structural integrity in such areas
Durability and strength
GRP tanks have a much longer lifespan and can last for decades with minimal maintenance because of superior uv protection. Then on the other hand, plastic tanks will eventually breakdown or become brittle with time especially when exposed to harsh environmental conditions
Chemical resistance
GRP tanks are an ideal solution for chemical storage in industries, laboratories or factories whereas plastic tanks easily fail
Higher temperature resistant
GRP tanks can withstand higher temperatures compared to plastic tanks. Plastic tanks can degrade or fold when exposed to heat whereas GRP tanks remain stable even when exposed to high temperatures
Are there premade tank stands for GRP tanks?
Yes many suppliers offer pre-engineered tank stands for light weight tank. For heavy tanks, you have to follow the structural engineer’s drawings and construct a tank stand able to support the tank full weight on site to fits permanent position
What is the cost of building a tank stand for a GRP tank?
Constructing a concrete tank stand can range from500$ - 5000$ for larger tanks or even more depending on the size of the GRP tank. Alternatively you can use fabricated steel sections with braces to act as a stand for the GRP tank
How do you build a concrete tank stand for GRP tanks?
To build a stand for GRP tanks, we use a mat foundation with concrete stands spaced at 1m each centre to centre form one stand to another, these stands should be at least 300mm wide and also there should be clear space of 500mm from the ground to the tank
How long can a GRP tank last?
A GRP tank can last for 25-35 plus years depending on the maintenance. They can last for very many years because they are highly resistant to harsh environmental conditions